The following technique uses a height map to tell 3DS Max which parts of the object are higher than the others.
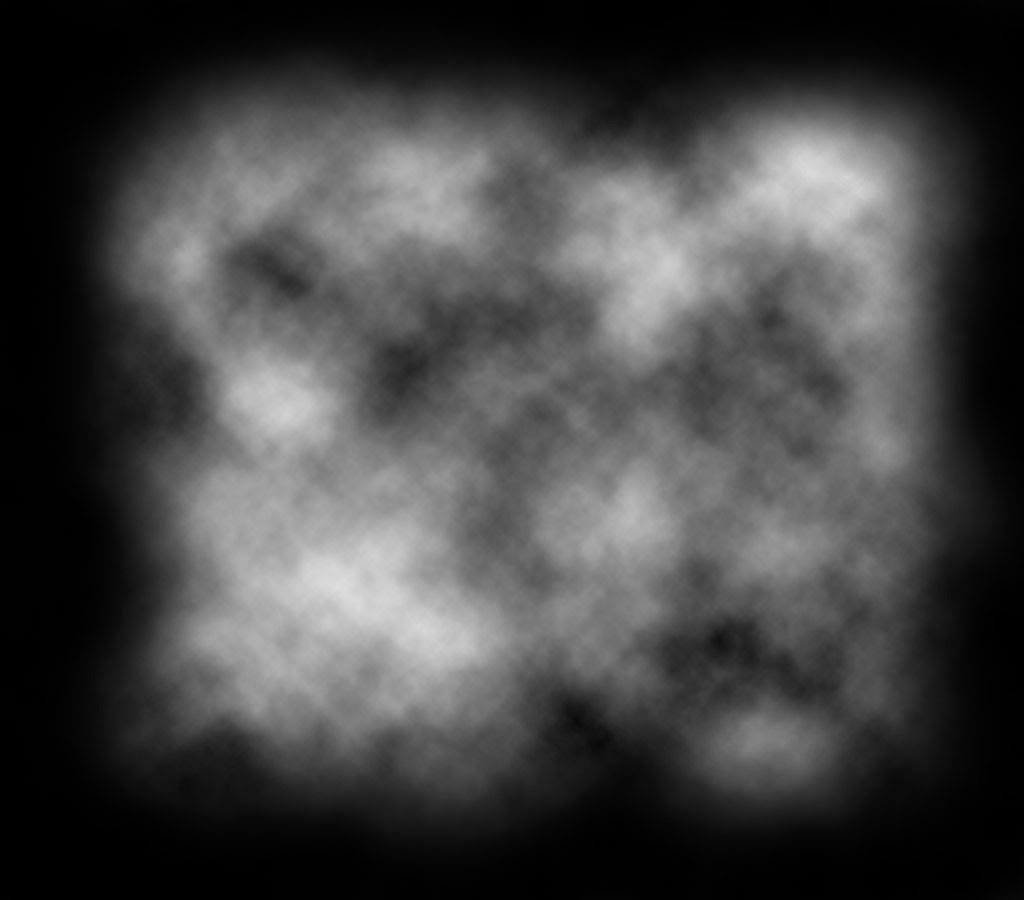
A height map is a black and white image where black is the lowest part of the map and white is the highest.
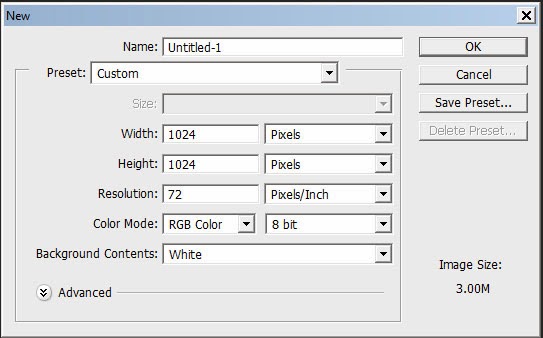
To create the height map, open Photoshop and make a new image at 1024x x 1024 pixels (File > New... or Ctrl + N).
Fill the background with black and create a new layer (Layer > New > Layer... or Ctrl + Shift + N).

Make sure your foreground is set to white and your background to black, then apply the clouds filter (Filter > Render > Clouds).
As you will see the filter produces totally random results. Try re-applying the filter a few times to see the variations it can make.
Save your image as a JPEG file (3DS Max will recognize PSD files, but they are usually quite big).
 Open 3DS Max and create a plane in the top view (Create > Standard Primitives > Plane). Set the length and width to 100 and the segments to 50 x 50.
 In the viewport, turn edged faces on to see the individual polys that have been created.
This will give us enough geometry to create some detail without over burdening the system (this type of map can be quite processor-intensive).
The more segments the plane has, the more retailed the terrain will be. We may need to increase this later, but avoid the temptation to use too many segments as this is likely to crash the system.
Next, we will apply a displace modifier to the plane (Modifiers > Parametric Deformers > Displace)
 You will not notice any immediate change to the shape of the plane because we've not told the software what shape the displacement will be or the strength of the displacement.
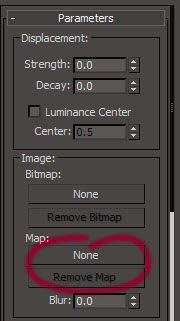
 The shape of the displacement will come from the height map we created earlier.. To apply it, click on the Map button in the Image section of the modifier's properties. Select Bitmap from the list of maps and navigate to where you saved your height map.
Again, you will not see a difference in the shape of the plane because we have not set the strength of the modifier.
Change the strength to 10 in the modifier properties (just above where you set the map). Your plane should now start to resemble a section of terrain.
Try changing the strength to see how it effects the terrain. Try to avoid extremes as it will start to look unnatural (unless you are trying to make the surface of the asteroid in the film Armageddon).
 Now we have a terrain that has realistically random bumps, but the edges stop abruptly and spoil the scene. To edit the shape of the terrain, all we need to do is edit the image.
 Open the height map image in Photoshop and select a very large soft brush (I am using 300px wide, 0% hardness). Use the brush to paint a rough black edge on the image.
Save the image and go back to 3DS Max. If you have saved over your original height map using the same file name, you should see that the scene has updated to reflect the changes.
If not, reapply the map by clicking in the map button of the displace modifier properties.

If the terrain looks a little blocky, you could try changing the segments of the plane (but try not to overdo it).
In part 2 of this tutorial we will look at how to add materials to this scene.
0 comments:
Post a Comment